Working out correct solar plate exposure


I have a love/hate relationships with solar plate printing since being introduced to them on a weekend course in 2003. Undeniably it is a great addition to intaglio printmaking, saving a lot of the faff of traditional etching not to mention acid exposure and specialist equipment. However the relatively high cost and elusive nature of the correct exposure times have left me baffled and vowing never to use them again on more than one occasion. The plates I used for these prints are Toyobo Printight plate KM73's from Intaglio Printmaker in London.
Pros: can be developed in water, shorter exposure times, ability to reproduce fine detail from photographic or hand drawn positives, Once correctly exposed they are easy to ink and can produce large print runs with no degradation of the image,
cons: expensive (around £11 for an A4 plate & £6.60 for an A5 from intaglio printmaker), relies on access to a reliable UV lightsource, if you mess it up they cannot be reworked easily so you have to use another plate, they print with an inherent plate tone
My latest explorations have been more successful thanks to a conversation with my long suffering husband who is an experienced black and white photographer just reaquainting himself with the darkroom. He loves nothing more than the opportunity to discuss stouffer wedges and other confusing exposure systems. He suggested producing a test plate which would show different combinations of aquatint screen and positive image in a grid format. This was instead of a test strip (which in my case, once created seemed to bear little resemblance to the resulting print).
TEST PLATE METHOD:
To produce a successful test plate for my 'ebb and flow' print I cut the plate to the same size as the image I was exposing by cutting it using a metal guillotine. This can also cause warping of the plate but I found by cutting quickly rather than slowly the plate remained flatter. I then marked off a piece of thick card around slight larger than the width but twice as long at 2cm intervals with pencil lines all the way along.
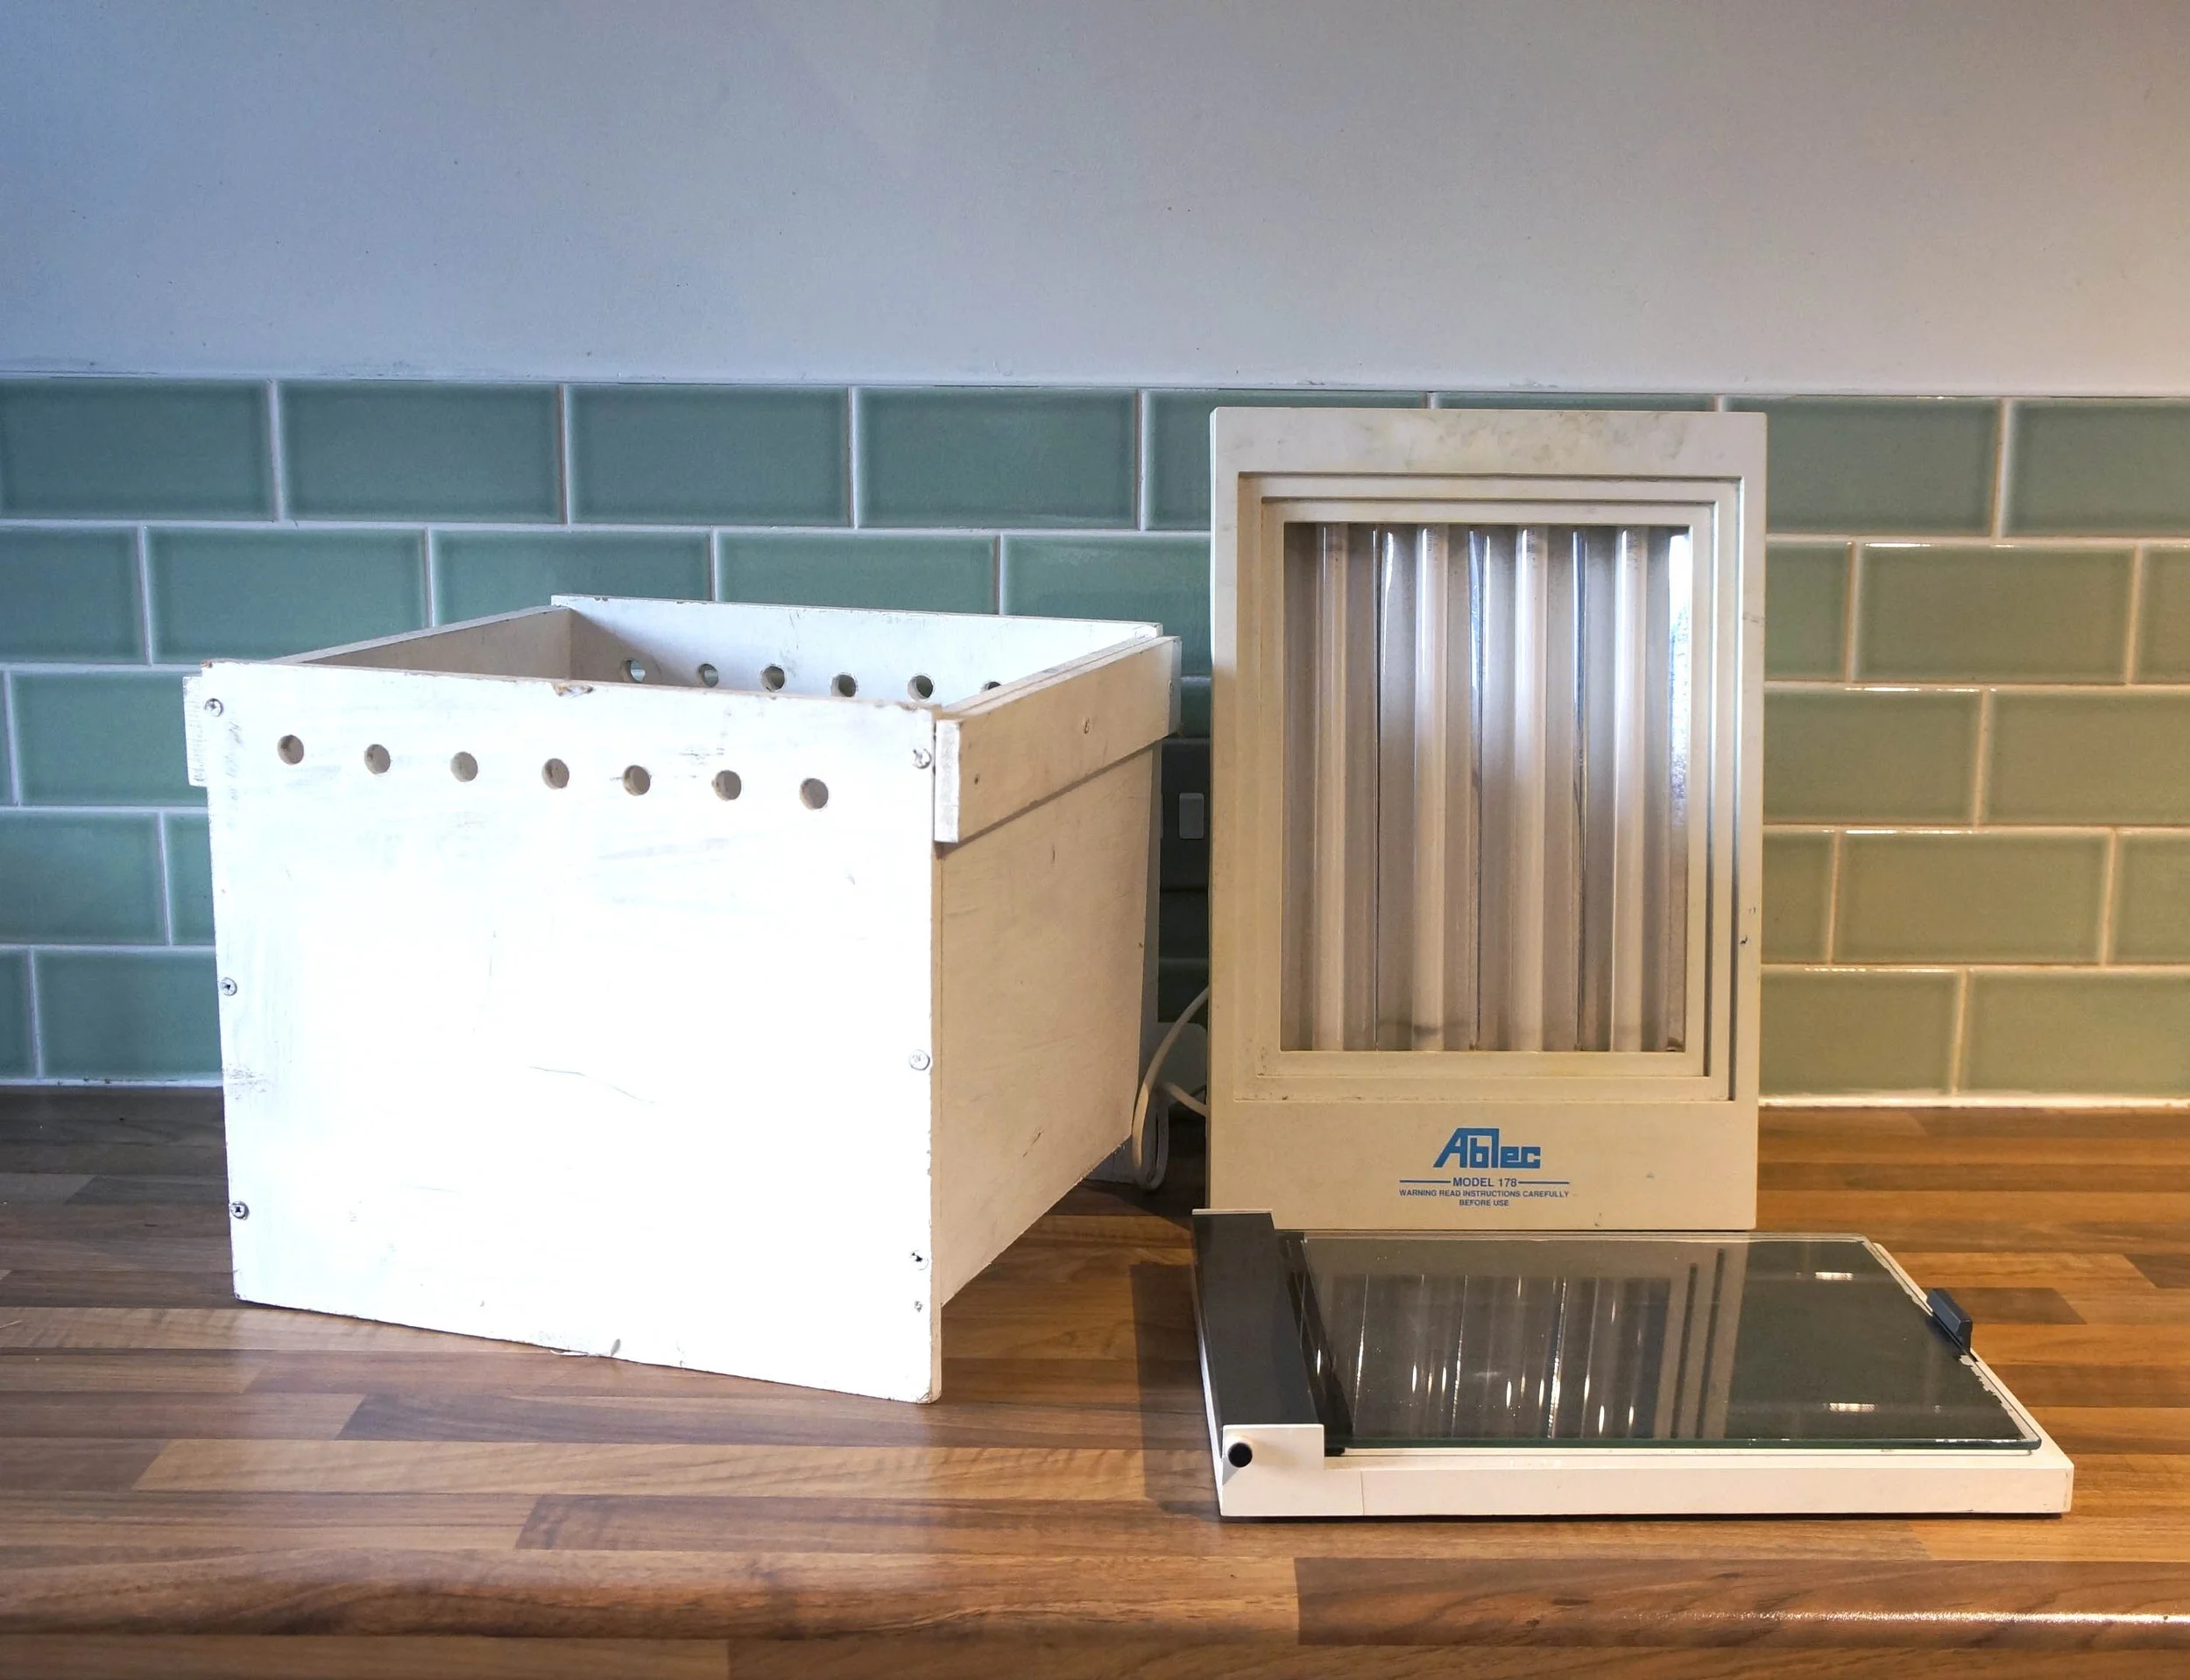
I placed the aquatint screen on top of the solar plate (remembering to remove the protective plastic and dusting with chalk to avoid sticking) under a heavy sheet of glass and placed my home made exposure using over the top. The unit is simple but effective - a facial solarium bought off ebay for £8 and a wooden box 30cm high made from mdf with holes drilled in the side to allow heat to escape. On one side there is a larger opening to allow me to flight a contact frame/plates in and out without disturbing the solarium.
I then covered the solar plate, aquatint screen and glass sandwich with the black card leaving a 2cm area exposed and turned the solarium on. Using a stopwatch I set the timer to run and at 10 second intervals I moved the black card along another 2cm, using the lines drawn on it as a guide). For the final exposure remember to take away the card completely so your last strip of solar plate will have 10 seconds of exposure. The solar plate will now have aquatint exposures from 10 up until around 140 seconds (depending on the size of your plate) going up in 10 second intervals. In subdued light I turned the plate over and marked lines on the back of the plate and labelled it as aquatint.
I then turned the plate 90 degrees clockwise and repeated the process this time replacing the aquatint screen for the acetate positive with my image on under the glass. Ensuring the solar plate is taped down to avoid movement during exposure I did another set of 10 second exposures for the image.
Once both aquatint and acetate image exposures are completed you can process the plate as normal:
PLATE PROCSSING:
Transfer to a tray of warm water (around 20ish degrees) in subdued light for 3 minutes.
First minute leave to sit in the water then begin to rock tray back and forth to help softened parts of the plate (those areas which were not hardened by exposure to light).
Scrub the plate with a soft brush to help softened areas wash away - not too hard or you will damage your plate.
when plate is thoroughly wash, blot and squeegee excess water quickly and blow dry if possible to avoid water spots drying on the plates and making marks.
Leave to dry for 15-20 minutes preferably on cool setting of a fan or you can air dry. Don't add excess heat as this can soften the plate surface.
Do a further post hardening exposure for around 3-5 minutes then you're ready to print.
I used a drypoint tool to scratch lines at 2cm intervals in a grid over the test print to help me work out best exposures. Also make a note of which direction you did the aquatint and which is the positive image.
Ink and print onto dampened printmaking paper to assess a range of exposure times for both aquatint and image.